Table of Contents
Growing carrots looks simple from the outside, but the quality of your harvest comes down to one thing: getting the basics right from the start. Carrots are particular about soil, moisture, and spacing. Once you understand those needs, they become one of the most rewarding crops you can grow at home. This guide breaks down how to plant carrots and grow carrot plants successfully in any garden setting—raised beds, containers, or traditional rows. You’ll get practical steps, expert reasoning, and simple methods that avoid unnecessary complications.
What Carrots Need to Grow Well
Before diving into the practical steps, it helps to understand how a carrot actually grows. Carrots produce a central taproot, and this root expands downward before it fattens sideways. Any barrier—stones, clumps, hard soil—causes that taproot to fork or twist. Here are the core requirements for a healthy carrot plant:
- Soil
- Loose, fine, sandy or loamy texture
- Deep (minimum 10–12 inches)
- Well-draining
- Free of rocks or clods
- pH: Slightly acidic to neutral (6.0–6.8)
- Temperature:
- Ideal germination: 10–21°C (50–70°F)
- Ideal growing conditions: cool weather, especially early spring or fall
- Sunlight: Full sun (6–8 hours)
Understanding these needs will shape every step of how to grow carrot plant successfully.

When to Plant Carrots
Carrots perform best in cool weather, and the timing of when you sow them has a big effect on flavor, texture, and overall success. If you’re planting a spring crop, start sowing seeds about two to three weeks before the last expected frost date. The soil doesn’t need to feel warm yet; it just needs to be workable and loose enough for the tiny seeds to settle in. Cool air doesn’t bother carrot seeds, but compact or frozen ground does.
For a fall crop, the timeline shifts earlier in the season. Count back ten to twelve weeks from your first expected frost and sow seeds around that point. As temperatures drop, the roots begin converting stored starch into natural sugars. This is why carrots grown in cooler weather taste noticeably sweeter, especially after a light frost.
If you want a steady flow of carrots instead of one large harvest, succession planting is the easiest method. Rather than sowing all your seeds at once, plant small rows every two to three weeks from early spring until mid-summer. This creates a smooth harvest cycle, helps you avoid gaps in production, and reduces the risk of having too many carrots ready at the same time.
Preparing the Soil: The Most Important Step in How to Plant Carrots
If there’s one part of carrot growing that separates great harvests from disappointing ones, it’s the soil. Carrots simply won’t develop properly in compact, shallow, or rocky beds. The goal is simple: make it easy for the taproot to grow straight and deep.
Step-by-Step Soil Preparation
- Loosen the soil to 10–12 inches using a fork or tiller.
- Remove roots, stones, sticks, and debris.
- Add compost (well-rotted, not too fresh).
- Avoid high-nitrogen fertilizers, which encourage leaf growth at the expense of root size.
- Rake the surface flat and fine—carrot seeds need good seed-to-soil contact.
Raised Beds & Containers
A great workaround for poor native soil:
- Use a 12–14 inch deep raised bed filled with loose, airy mix.
- or a bucket, grow bag, or deep pot with drainage holes.
Varieties like Parisian, Oxheart, or Thumbelina work especially well in containers.
How to Plant Carrot Seeds (The Right Way)
Carrots should always be direct-sown. Transplanting damages the taproot and produces twisted or stunted carrots.

Sowing Instructions
- Create shallow rows about 1/4 inch deep.
- Sow seeds thinly.
They are tiny, so many growers mix them with sand to spread them evenly. - Cover lightly with sifted soil or compost.
- Water gently to avoid disturbing seeds.
Row Spacing
- Space rows 12–18 inches apart.
- Dense sowing is normal, but thinning is essential later.
Germination Tips
Carrot seeds are slow to sprout—often 10–21 days. During this time:
- Keep the seed bed consistently moist.
- Use a fine mist or watering can to avoid washing them away.
- If your soil crusts easily, cover the row with a thin board or burlap for a few days.
This is one of the most overlooked parts of learning how to plant carrot plants. Consistent moisture is the difference between even germination and patchy rows.
Caring for Seedlings: Watering, Thinning, and Early Growth
Once the young seedlings appear, they need enough room to develop straight, full-sized roots. Carrots that grow too close together compete underground, which leads to thin, crooked, or forked roots. When the seedlings reach about two inches in height, it’s time to thin them. The easiest and safest method is to snip the extra plants at the base with scissors rather than pulling them out by hand, because pulling can disturb the fragile taproots of nearby seedlings. Aim to leave about two to three inches of space between each plant so each carrot has the room it needs to expand properly.

Watering during early growth needs consistency. Carrots require steady moisture, roughly the equivalent of an inch of water per week, and this helps the roots grow smoothly without cracking. Soil that dries out and then gets heavily watered can cause splitting, so try to maintain an even moisture level rather than alternating between dry and soaked. A thin layer of mulch—such as straw, shredded leaves, or another fine organic material—helps the soil retain moisture, keeps the temperature cooler, and naturally suppresses weeds.
Weeding around carrots must be done gently. Their root systems are delicate, and aggressive weeding can easily disturb or damage the plants. It’s better to remove weeds while they are small, using careful hand-pulling or very shallow cultivation. The mulch you applied earlier will also reduce the number of weeds that even make it through to the surface, making the job easier and safer for your carrot bed.
Ongoing Care: Water, Fertility, and Pest Management
Once your carrot plants are established, the care they need becomes more about consistency than intensity. Carrots grow underground, so moisture plays a major role in how smoothly the roots develop. The soil should never swing between very dry and very wet because these fluctuations cause the roots to crack or split. Deep watering encourages the roots to grow downward instead of staying shallow, and it keeps the soil evenly moist for longer. Light sprinkling on the surface doesn’t reach the taproot, so deeper, slower watering works far better. If you’re unsure about moisture levels, a simple soil moisture meter removes the guesswork and helps you avoid both underwatering and accidental overwatering.
Carrots generally do not need heavy feeding, especially if the soil was prepared well at the beginning. Too much nitrogen leads to lush green tops while the roots stay small and thin, so it’s best to avoid rich fertilizers. If your soil is poor or sandy, you can use a balanced or low-nitrogen fertilizer, such as a 5-10-10 mix, applied sparingly. This supports the root development without overstimulating the foliage. Compost worked in ahead of planting usually provides more than enough nutrition for the entire season.
Pest management for carrots varies depending on your region, but the most common issue is the carrot rust fly. The larvae feed on roots, leaving tunnels and scars. The simplest prevention is to place a row cover over the bed right after sowing, which blocks the adults from laying eggs near the plants. Crop rotation also helps because pests tend to build up in soil where the same crop is grown repeatedly. Nematodes can also be a problem in some areas, often leading to stubby or misshapen roots. Improving soil health with compost and avoiding continuous carrot planting in the same space reduces this risk.
Aphids occasionally appear on carrot foliage, but they rarely damage the roots and can be washed off with water or controlled with natural predators like ladybugs. Diseases such as root rot and leaf blight usually stem from poor drainage or overcrowding, so keeping the bed well spaced and avoiding overhead irrigation goes a long way toward preventing problems.
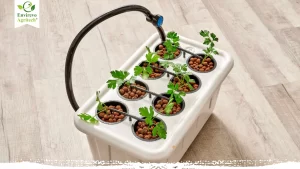
How to Grow Carrot Plant in Containers
Carrots adapt surprisingly well to pots as long as you provide the right depth and soil texture. A container that is at least twelve inches deep gives the taproot enough room to grow straight, which is essential for producing full-sized, healthy carrots. The pot should have excellent drainage so that water doesn’t collect at the bottom and cause root rot. A loose, airy potting mix works much better than dense garden soil, helping the roots move freely and develop evenly.
Just like in a garden bed, container-grown carrots need plenty of sunlight. Placing the pot where it receives full sun for most of the day ensures steady growth and good flavor. Some varieties perform better in containers than others, especially shorter or round types that don’t require long root development.
Best Varieties for Containers
- Parisian
- Oxheart
- Short ‘n Sweet
- Little Finger
Tips
- Water more frequently than in-ground beds.
- Do not let the container dry out completely—carrots stop developing evenly.
- Containers warm up faster, which speeds growth, especially early in the season.
When to Harvest Carrots and How to Do It Safely
Different varieties mature at different times, but most carrots are ready 55–80 days after sowing.

Signs of Readiness
- The carrot shoulders (top edges) begin to show at the soil surface.
- Roots reach the advertised diameter (usually ¾–1 inch).
- Foliage looks healthy and full.
Harvesting Method
- Loosen soil with a fork if it’s dense.
- Grip the carrot at the base of the foliage.
- Twist gently and pull upward.
After Harvest
- Trim greens to 1 inch to prevent moisture loss.
- Wash gently to remove soil.
- Store in the refrigerator or a cool, humid area.
Common Problems and How to Fix Them
1. Forked or Twisted Roots
Carrots develop forked or twisted roots when the soil is too heavy, compact, or full of small stones that interfere with the taproot. Excess nitrogen can also distort root growth, as can disturbing young seedlings during thinning. The best way to avoid this is to prepare deep, loose soil before planting, thin seedlings gently and early, and avoid over-fertilizing.
2. Poor Germination
Poor germination is usually tied to moisture problems. Carrot seeds sit close to the soil surface, so if the top layer dries out or forms a crust, the seeds struggle to sprout. High temperatures make this worse. Keeping the seedbed evenly moist, shading it lightly during hot periods, or covering it with burlap for the first few days all improve germination rates.
3. Small or Thin Carrots
When carrots grow thin, stunted, or small, it’s almost always because they don’t have enough space, sunlight, or consistent moisture. Crowded seedlings compete underground, shaded plants can’t develop strong foliage to fuel root growth, and uneven watering stresses the plant. Thinning seedlings properly, growing carrots in full sun, and watering consistently solves most of these issues.
4. Carrots Splitting
Carrot splitting usually appears late in the season and happens when dry soil suddenly receives a lot of water. The roots absorb moisture too quickly and crack under pressure. Keeping the soil evenly moist throughout the growing period and using mulch to reduce evaporation helps prevent splitting and keeps the roots growing steadily.
Whether you’re working in raised beds, containers, or traditional garden rows, these steps will help you grow straight, flavorful, vibrant carrots with ease. Once you master how to plant carrot plants correctly, the growing process becomes incredibly rewarding.