Table of Contents
Are you tired of the hassle and mess of traditional soil-based gardening? Do you want to take your green thumb to the next level? In this comprehensive guide, you’ll discover how to cultivate delicious, nutrient-rich spinach in just 45 days, without a single speck of soil.
Hydroponic gardening offers numerous advantages over traditional methods, including increased yields, reduced water usage, and the ability to grow your favourite vegetables year-round, regardless of the weather outside. Spinach, in particular, thrives in a hydroponic system, providing you with a steady supply of this superfood packed with vitamins, minerals, and antioxidants.
Whether you’re a seasoned gardener or a complete beginner, this article will walk you through the step-by-step process of setting up your own hydroponic spinach system and guide you through the pre-germination and growing stages. Get ready to enjoy the fresh, crisp taste of homegrown spinach in a matter of weeks!
Necessary Equipment and Materials For Spinach Growing
To embark on your hydroponic spinach adventure, you’ll need the following essential equipment and materials:
Hydroponic System Setup
- A hydroponic growing system, such as a deep water culture (DWC) or a nutrient film technique (NFT) system
- Growing trays or containers
- Air pump and air stones for oxygenation
- Water pump and tubing
Grow Lights (if indoor)
- High-quality LED or fluorescent grow lights
- Adjustable light stands or fixtures
Nutrient Solutions
- Hydroponic nutrient solution, formulated specifically for leafy greens
- pH and EC (electrical conductivity) meters to monitor water quality
Seeds and Growing Medium
- High-quality spinach seeds, preferably a variety suited for hydroponic growth
- Growing medium, such as rockwool, coco coir, or perlite
Setting Up Your Hydroponic System for Spinach Growing
Before you can start growing your hydroponic spinach, you’ll need to set up a suitable system. Here’s what you’ll need:
Step-by-Step Setup
- Assemble the Hydroponic System: Follow the manufacturer’s instructions to set up your chosen hydroponic system, ensuring all components are properly connected and functioning.
- Install Grow Lights: If you don’t have access to natural sunlight, you’ll need to provide your spinach plants with supplemental lighting, such as LED or fluorescent grow lights. Position the grow lights above the growing area, adjusting the height as the plants mature.
- Prepare the Nutrient Solution: Mix the hydroponic nutrient solution according to the manufacturer’s recommendations, ensuring the proper pH and EC levels.
- Set Up Timers and Monitors: Install timers to control the lighting schedule and water pumps, and place the pH and EC meters in the nutrient solution for continuous monitoring.
Once you have all the necessary components, it’s time to set up your hydroponic system. Start by filling the grow tray or container with your chosen growing medium, ensuring it’s evenly distributed. Then, connect the water pump and tubing, and fill the tray with the nutrient solution, following the manufacturer’s instructions for the correct dilution.
If you’re using grow lights, position them approximately 6-12 inches above the growing medium and set them to provide 10-12 hours of light per day. Adjust the height and duration as needed to ensure your spinach plants receive the optimal amount of illumination.
Now that your hydroponic system is set up, it’s time to move on to the pre-germination process.
Pre-Germination Process of Spinach Growing in Hydroponics
Seed Selection
Choosing the right spinach variety is crucial for successful hydroponic growth. Some of the best spinach varieties for hydroponics include:
- ‘Bloomsdale Long Standing’
- ‘Catalina’
- ‘Corvair’
- ‘Olympia’
Look for seeds that are specifically labelled as “hydroponic” or “greenhouse” varieties, as they are often better suited for the unique growing conditions of a hydroponic system.
Purchasing Quality Seeds
When purchasing spinach seeds, make sure to buy from a reputable supplier or seed company. Look for seeds that are fresh, plump, and free of any visible defects or damage. Avoid purchasing seeds that are past their expiration date, as this can affect their germination rate and overall plant health.
Seed Soaking
Start by soaking your spinach seeds in water for 12-24 hours. This will help soften the seed coat and kickstart the germination process.
By following these pre-germination steps, you’ll give your spinach plants the best possible start in your hydroponic system, setting them up for rapid growth and a bountiful harvest.
Germination Process
Preparing the Growing Medium
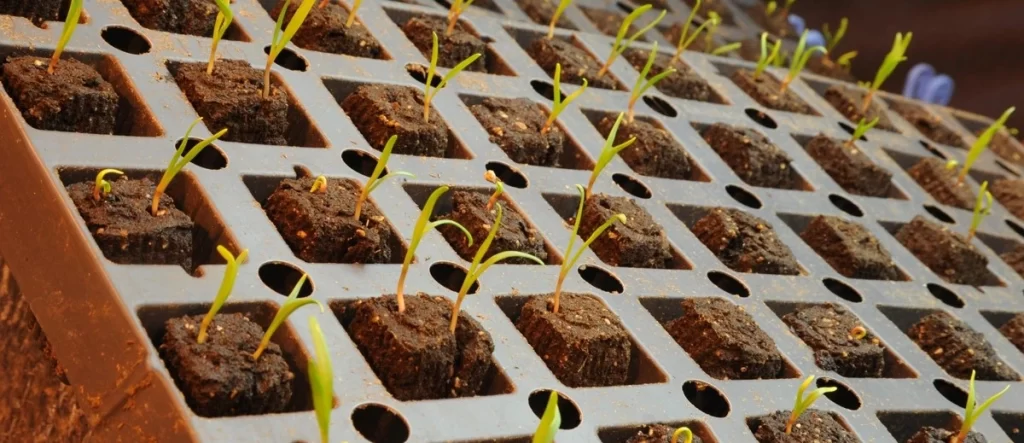
Depending on your chosen hydroponic system, you’ll need to prepare the growing medium. For example, if using rockwool, soak the cubes in the nutrient solution to ensure they are fully saturated before planting the seeds.
Planting the Seeds
Carefully place the spinach seeds into the growing medium, following the recommended depth and spacing guidelines. Gently press the seeds into the medium to ensure good seed-to-medium contact.
Maintaining Optimal Conditions for Germination
Keep the growing medium consistently moist, but not waterlogged, during the germination process. Maintain a temperature range of 64-82°F (18-28°C) and provide ample light, either from natural sunlight or grow lights, for 10-12 hours per day.
Transferring Seedlings to the Hydroponic System
Once the spinach seeds have germinated and developed their first set of true leaves, carefully transplant the seedlings into the prepared hydroponic system, ensuring the roots are submerged in the nutrient solution.
Maintaining and Monitoring Growth
Nutrient Solution Adjustment
In the first few days after transplanting, you’ll need to gradually increase the strength of your nutrient solution to match the growing needs of your spinach plants. Start with a diluted solution and gradually increase the concentration over the course of a week or two.
Daily Care and Maintenance
Regularly check the pH and EC levels of the nutrient solution, adjusting as needed to maintain the optimal range for spinach growth. Top up the water levels as necessary to ensure the roots are consistently submerged.
Light Requirements
Spinach thrives in a well-lit environment, requiring 10-12 hours of light per day. Adjust the height of the grow lights as the plants grow taller to maintain the optimal distance from the canopy.
Temperature and Humidity Control
Maintain a temperature range of 64-82°F (18-28°C) and a relative humidity level of 60-80% for optimal spinach growth. Use fans or dehumidifiers to regulate the environment if necessary.
Common Issues and Solutions
Nutrient Deficiencies
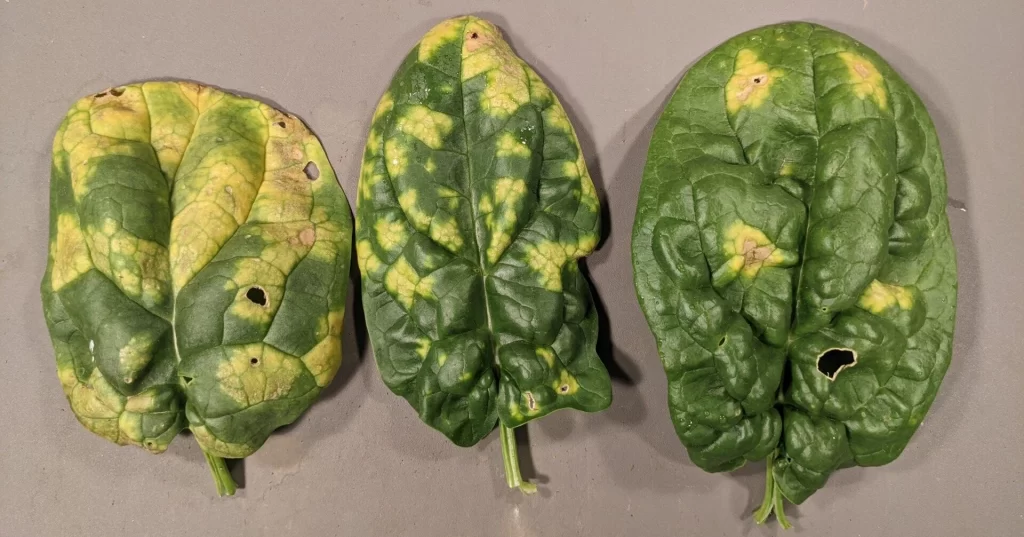
One of the most common challenges in hydroponic spinach cultivation is nutrient deficiencies. Proper nutrient management is crucial for healthy plant growth and optimal yields. Let’s explore some common nutrient deficiencies and how to address them:
- Nitrogen Deficiency: Symptoms include stunted growth, yellowing of older leaves, and reduced leaf size. To correct this, increase the nitrogen content in your nutrient solution.
- Iron Deficiency: Leaves may appear pale or yellowish, with veins remaining green. Adding chelated iron to your nutrient solution can help resolve this issue.
- Phosphorus Deficiency: Slow growth, dark green or purple leaves, and poor root development are signs of phosphorus deficiency. Increase the phosphorus levels in your nutrient solution.
By regularly monitoring your plants and adjusting the nutrient levels accordingly, you can ensure your spinach plants receive the essential nutrients they need to thrive.
Pest and Disease Management
Regularly inspect your plants for common pests like aphids or spider mites, and take appropriate organic or chemical measures to control any infestations. Monitor for signs of disease, such as root rot or fungal growth, and address the issue promptly.
Hydroponic systems can be susceptible to pests and diseases, but with proactive measures, you can effectively manage these issues. Here’s what to look for and how to address them:
- Aphids: These small, sap-sucking insects can quickly infest your spinach plants. Use insecticidal soap or introduce beneficial predators like ladybugs to control aphid populations.
- Spider Mites: These tiny pests can cause discoloration and webbing on the leaves. Regularly misting your plants with water or using a miticide can help eliminate spider mites.
- Downy Mildew: This fungal disease can lead to yellowing and wilting of the leaves. Improve air circulation and use a fungicide to prevent and treat downy mildew.
By staying vigilant and addressing pest and disease issues promptly, you can maintain a healthy and thriving hydroponic spinach garden.
System Troubleshooting
Address any issues with the hydroponic system, such as clogged water pumps, algae buildup, or root rot, to ensure the optimal growing environment for your spinach plants. Maintaining a well-functioning hydroponic system is crucial for the success of your spinach cultivation. Let’s explore some common issues and how to resolve them:
- Root Rot: If you notice discoloured or slimy roots, it’s likely a sign of root rot. Improve your system’s aeration, adjust the pH, and use a hydrogen peroxide solution to treat the affected roots.
- Algae Growth: Excessive algae buildup can clog your system and compete with your spinach plants for nutrients. Increase water flow, reduce light exposure, and use an algaecide to keep algae in check.
- System Clogs: Debris or mineral buildup can obstruct water flow and disrupt your hydroponic system. Regularly clean your system components and use appropriate water filtration to prevent clogs.
By staying on top of system maintenance and addressing any issues promptly, you can ensure your hydroponic spinach garden thrives.
Harvesting and Post-Harvest Process of Spinach
Signs of Readiness
Spinach is typically ready to harvest when the leaves are 4-6 inches (10-15 cm) long and have a deep, vibrant green colour. Avoid harvesting leaves that appear wilted, discoloured, or damaged.
Determining the ideal time to harvest your spinach is crucial for maximizing the quality and flavour of your crop. Here are the key signs to look for:
- Leaf Size: Spinach leaves should be 4-6 inches long for optimal tenderness and flavor.
- Leaf Color: Healthy, vibrant green leaves indicate the spinach is ready for harvest.
- Plant Maturity: Mature plants with a well-developed root system and numerous leaves are ready to be harvested.
Harvesting Techniques
Use a sharp, clean knife or scissors to carefully cut the outer leaves, leaving the inner leaves to continue growing. This will allow for a continuous harvest over several weeks.
Proper harvesting techniques are essential to ensure the continued growth and productivity of your spinach plants. Follow these guidelines:
- Cutting Method: Use sharp scissors or a knife to cut the outer leaves, leaving 1-2 inches of stem attached to the plant. This encourages the plant to produce more leaves.
- Timing: Harvest in the morning when the leaves are turgid and crisp, typically every 2-3 weeks.
- Handling: Handle the harvested leaves gently to avoid bruising or damage.
Post-Harvest Handling and Storage
After harvesting, rinse the spinach leaves in cold water to remove any dirt or debris. Pat them dry and store them in the refrigerator in a sealed container or plastic bag for up to 5 days.
After harvesting, it’s important to properly handle and store your spinach to maintain its freshness and nutritional value:
- Washing: Gently rinse the harvested leaves with cool water to remove any dirt or debris.
- Drying: Pat the leaves dry with a clean, absorbent towel or use a salad spinner to remove excess moisture.
- Storage: Store the clean, dry spinach leaves in an airtight container or resealable bag in the refrigerator for up to 5 days.
By following these harvesting and post-harvest techniques, you can ensure your spinach remains fresh and flavorful, ready to be enjoyed in a variety of delicious dishes
Tips for Success and Continuous Growth
Continuous Harvesting Strategies
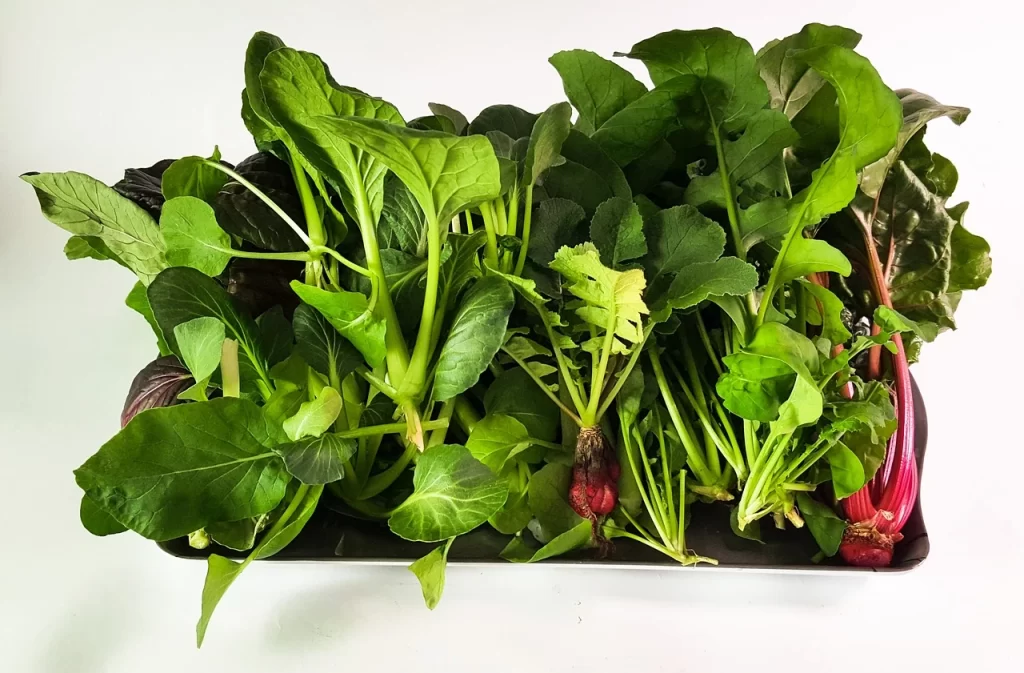
Implement a succession planting technique, where you sow new seeds every 2-3 weeks, to ensure a steady supply of fresh spinach throughout the growing season.
To maximize your spinach yield and enjoy a steady supply throughout the growing season, consider implementing continuous harvesting strategies:
- Succession Planting: Sow new spinach seeds every 2-3 weeks to create a continuous harvest cycle.
- Staggered Plantings: Divide your growing space into sections and plant spinach at different maturity stages to ensure a continuous harvest.
- Selective Harvesting: Harvest the outer leaves of your spinach plants, allowing the inner leaves to continue growing for future harvests.
Maximizing Yields with Proper Timing
Experiment with different nutrient formulations and growing media to find the optimal combination for your hydroponic setup. You can also integrate your hydroponic spinach system with other gardening methods, such as aquaponics or vertical farming, to maximize your yields.
- Ideal Growing Conditions: Maintain a temperature range of 64-82°F and provide your plants with 6-8 hours of direct sunlight/10-12 hours of supplemental lighting.
- Nutrient Cycling: Replenish your nutrient solution every 7-10 days to ensure your spinach plants have access to the essential nutrients they need.
- Harvesting Frequency: Harvest your spinach leaves every 2-3 weeks to encourage continued growth and productivity.
Advanced Techniques
As you gain more experience in hydroponic spinach cultivation, you can explore advanced techniques to further enhance your results:
- Nutrient Formulation Experimentation: Try different nutrient mixes and ratios to find the optimal blend for your specific growing conditions and spinach variety.
- Integrating Hydroponics with Other Gardening Methods: Combine your hydroponic system with complementary gardening techniques, such as aquaponics or vertical farming, to create a more diverse and productive growing environment.
- Cultivar Selection: Experiment with different spinach cultivars to find the ones that thrive best in your hydroponic setup and produce the flavours and textures you prefer.
By implementing these continuous harvesting strategies and optimizing your growing conditions, you can maximize the yields of your hydroponic spinach garden.
Conclusion
Congratulations! You now have the knowledge and tools to grow delicious, nutrient-rich spinach hydroponically in just 45 days, without the need for soil. Hydroponic gardening offers a clean, efficient, and sustainable way to cultivate your own fresh produce year-round, right in the comfort of your own home. Ready to take your gardening to new heights? Start your hydroponic spinach journey today by investing in a high-quality hydroponic system and the necessary supplies. With a little bit of care and attention, you’ll be enjoying the crisp, flavorful taste of homegrown spinach in no time.
By following the step-by-step instructions outlined in this article, you’ll be able to set up your own hydroponic spinach system, properly prepare your seeds, and monitor the growth and development of your plants to ensure a successful harvest. Embrace the power of hydroponic gardening and enjoy the countless benefits it has to offer.
Happy growing!
